
Starting Your First Game
From building to playing
Once your project has a setting and at least one playable character, you can launch a session from inside it. Games started from your own project work the same way as games started from Discover (you pick a character, the GM greets you, and the chat becomes your table). The difference is that as the project owner, you can keep building while you play. This guide walks through the launch flow and the in-game UI.
Launching a game
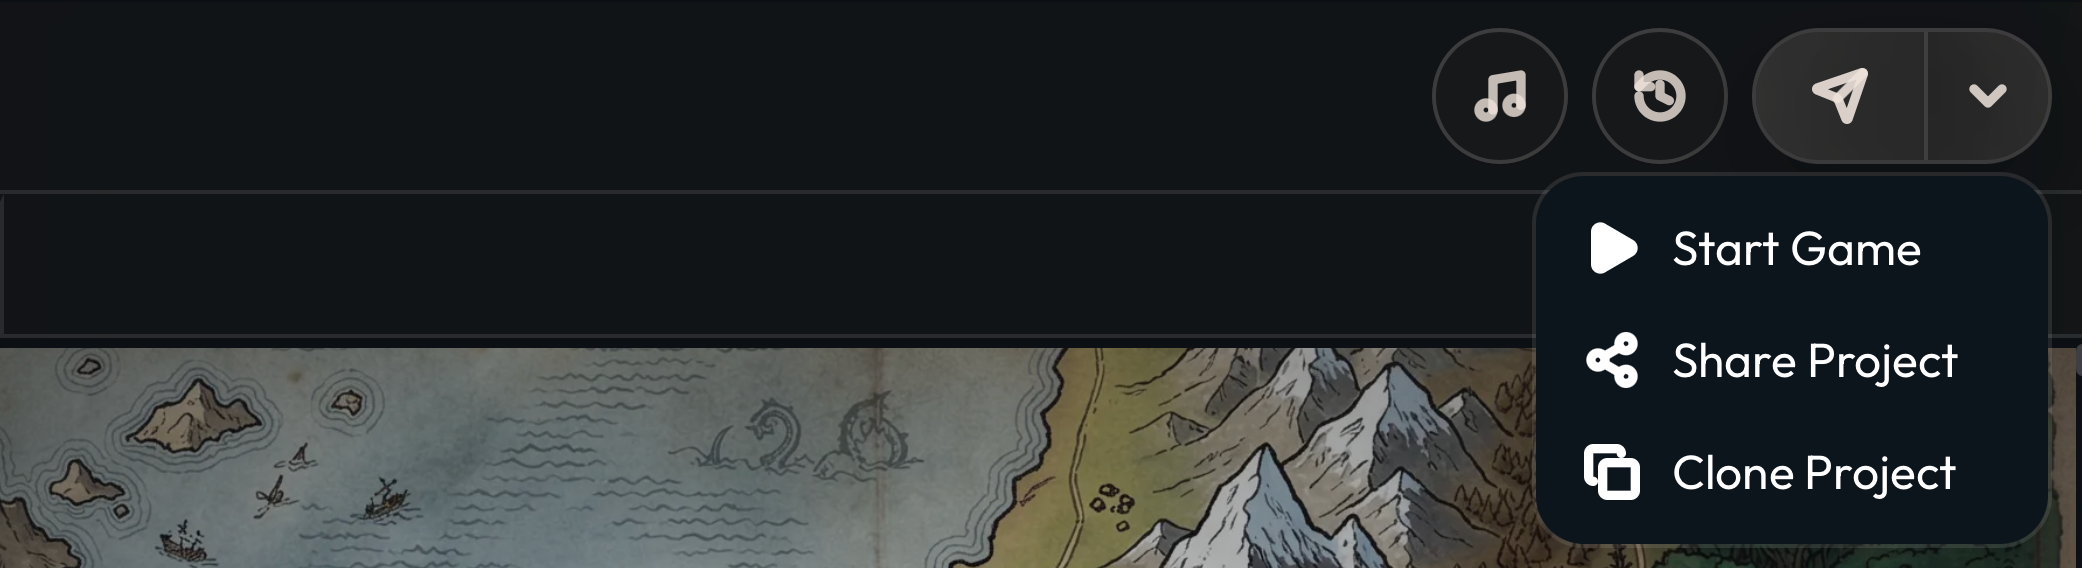
From your project workspace, look at the top right of the page. The Create Version button has a small chevron next to it that opens a dropdown menu.
-
Start Game – Spin up a new live session from this project.
-
Share Project – Get a shareable link to send to a player or post in your community.
-
Clone Project – Copy this project into a new private workspace, useful when you want to fork your own world or use it as a starting point for something else.
-
Version History – The saved versions of this project. See Version History and Retention.
Click Start Game. Craft creates a fresh game session and takes you straight to character setup. Every game you start from this project will show up under Games in the global sidebar so you can come back to it later.
Choosing or creating a character
What you see next depends on whether your project already has playable characters.
If you have characters
-
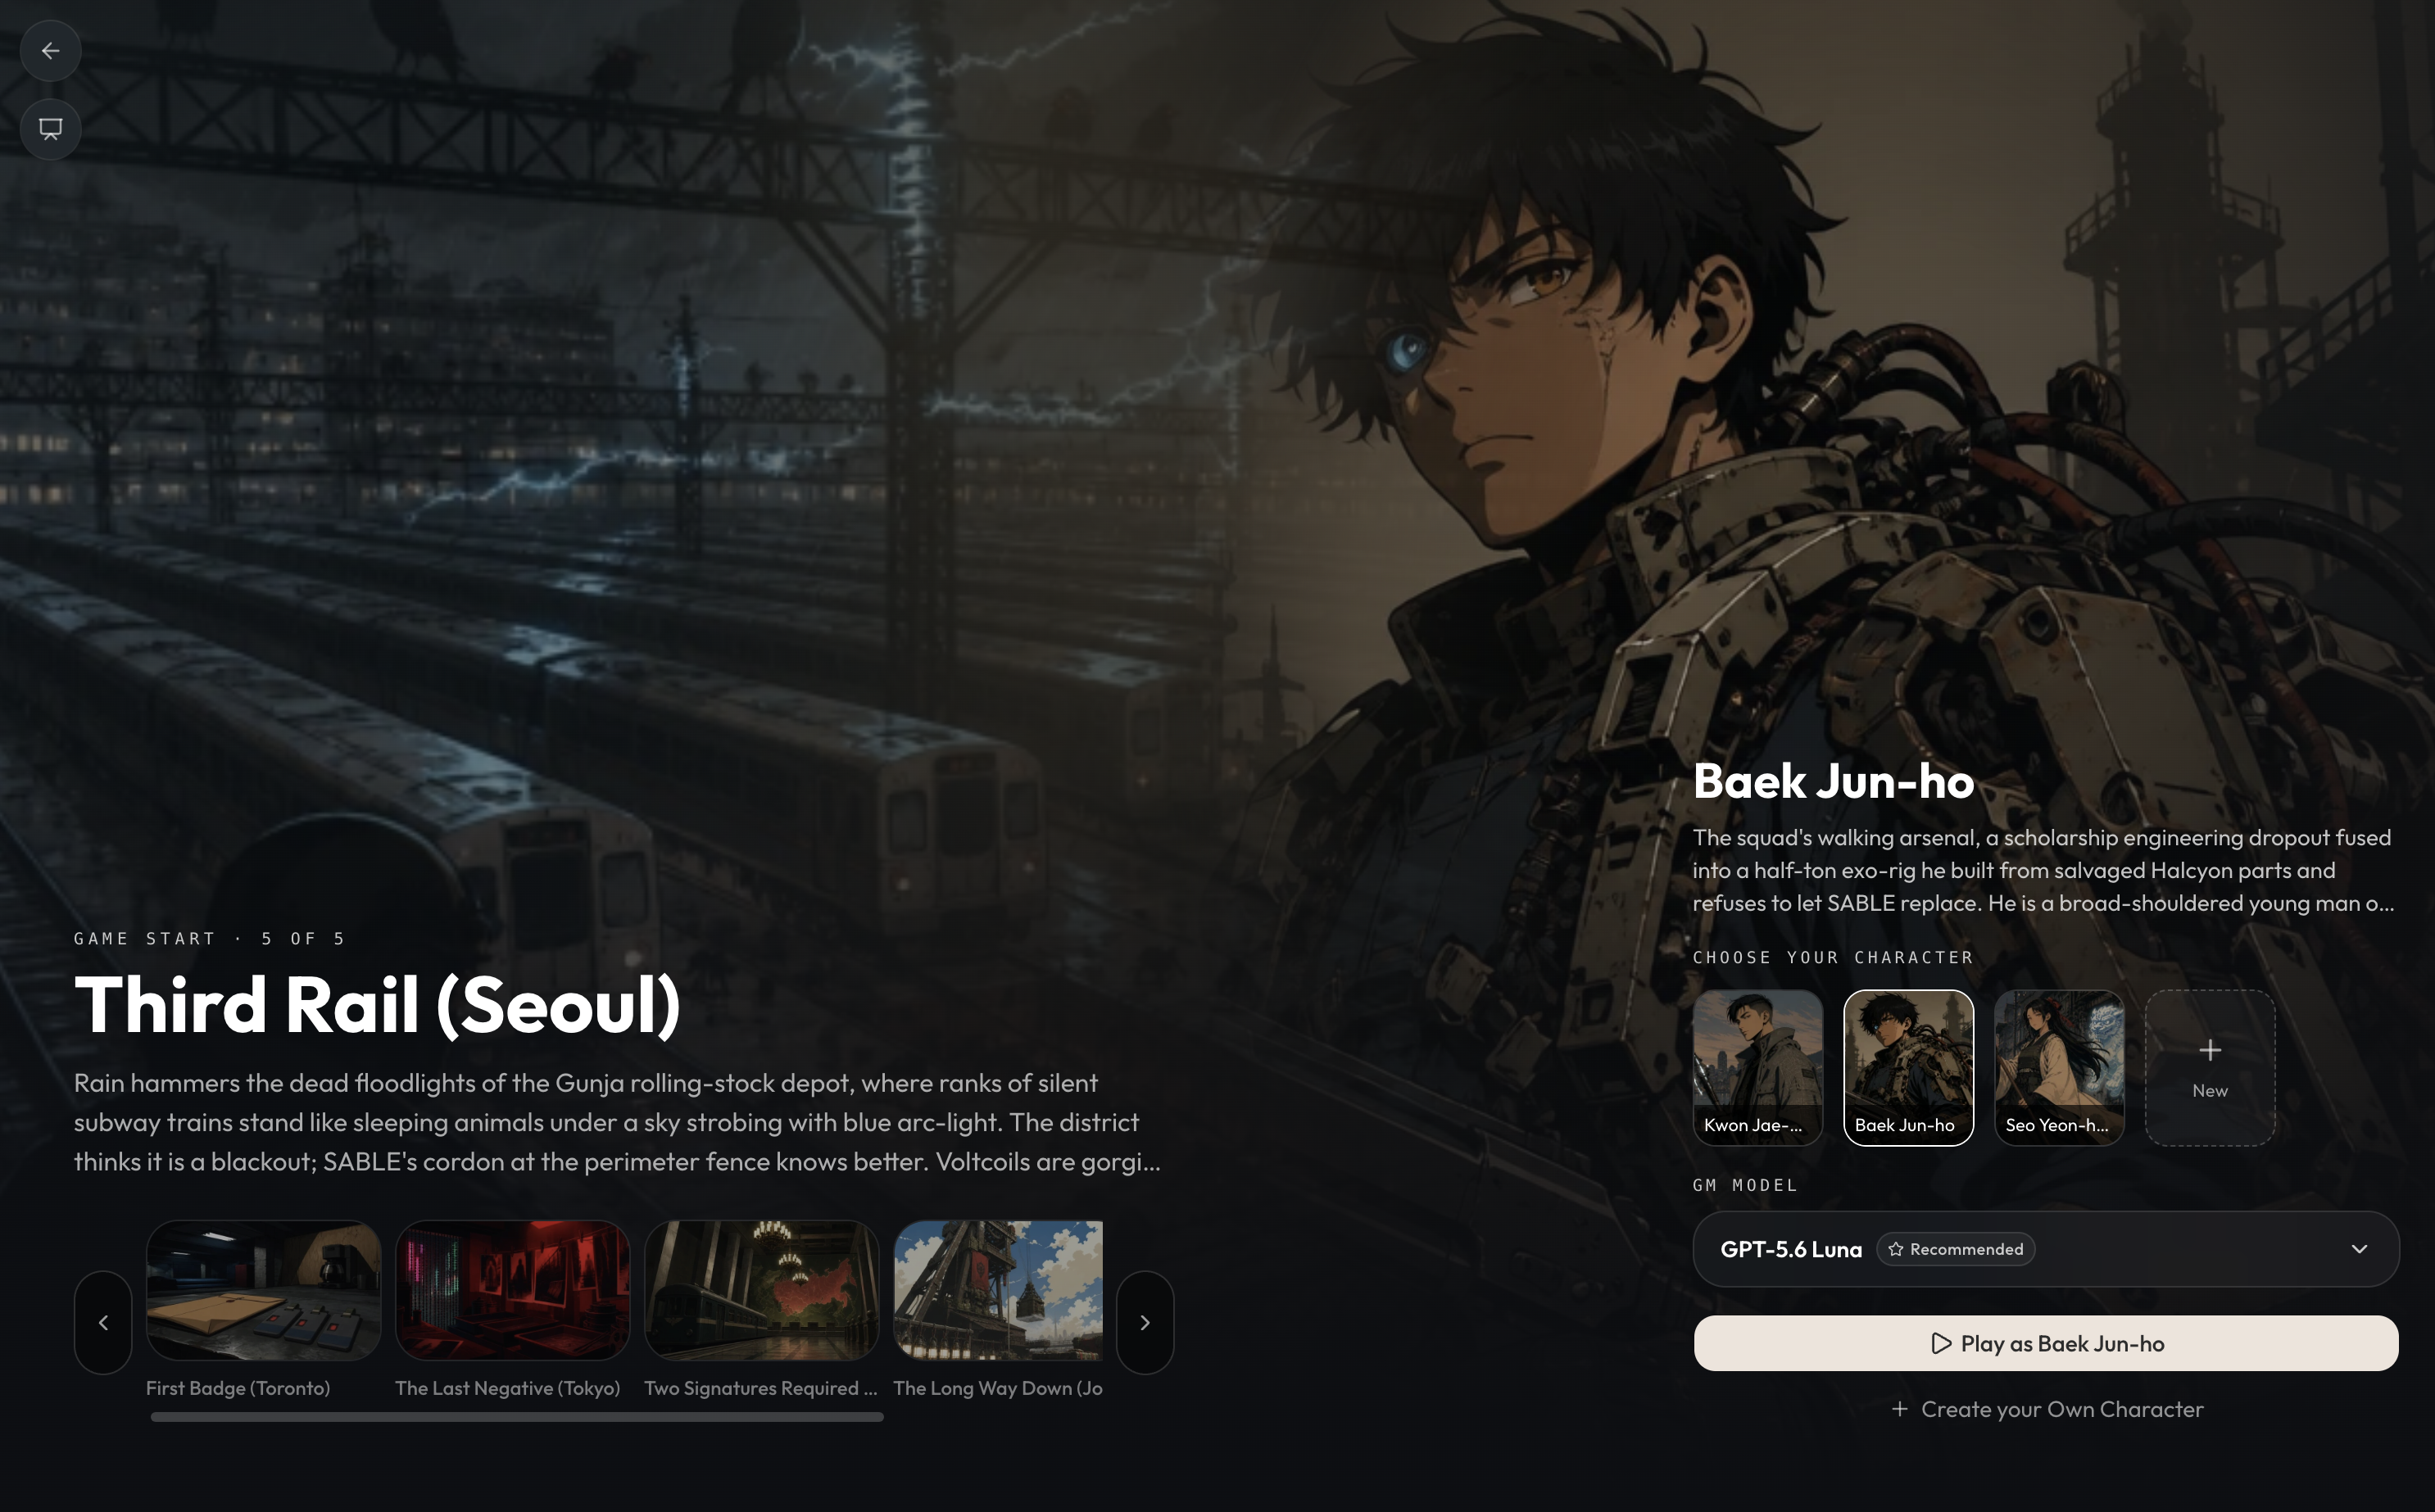
Craft drops you on the Choose your character screen with one tile per character at the bottom. Click any tile to preview it in the main view.
-
Click Select Character to start the session as the highlighted character.
-
Click + Create Character or the + New tile at the end of the strip to make a new one before playing.
If you don’t have characters yet
Craft skips the select screen and takes you straight into character creation. What happens next depends on your character file type:
-
If the file type has a creation flow — the guided, full-screen character creation you design when editing the file type — Craft plays it. Step through its screens and Craft generates the character sheet from your answers, with an optional portrait to go with it.
-
If there’s no creation flow, Craft opens the Create Character form instead. The form mirrors the schema you defined for your character file type — every field you added shows up here. Fill in the fields and click Create & Play to start the session as your new character.
Either way, the new character file is saved into your project alongside your other characters. Back out if you’d rather flesh out the character in the workspace before playing.
Your first turn
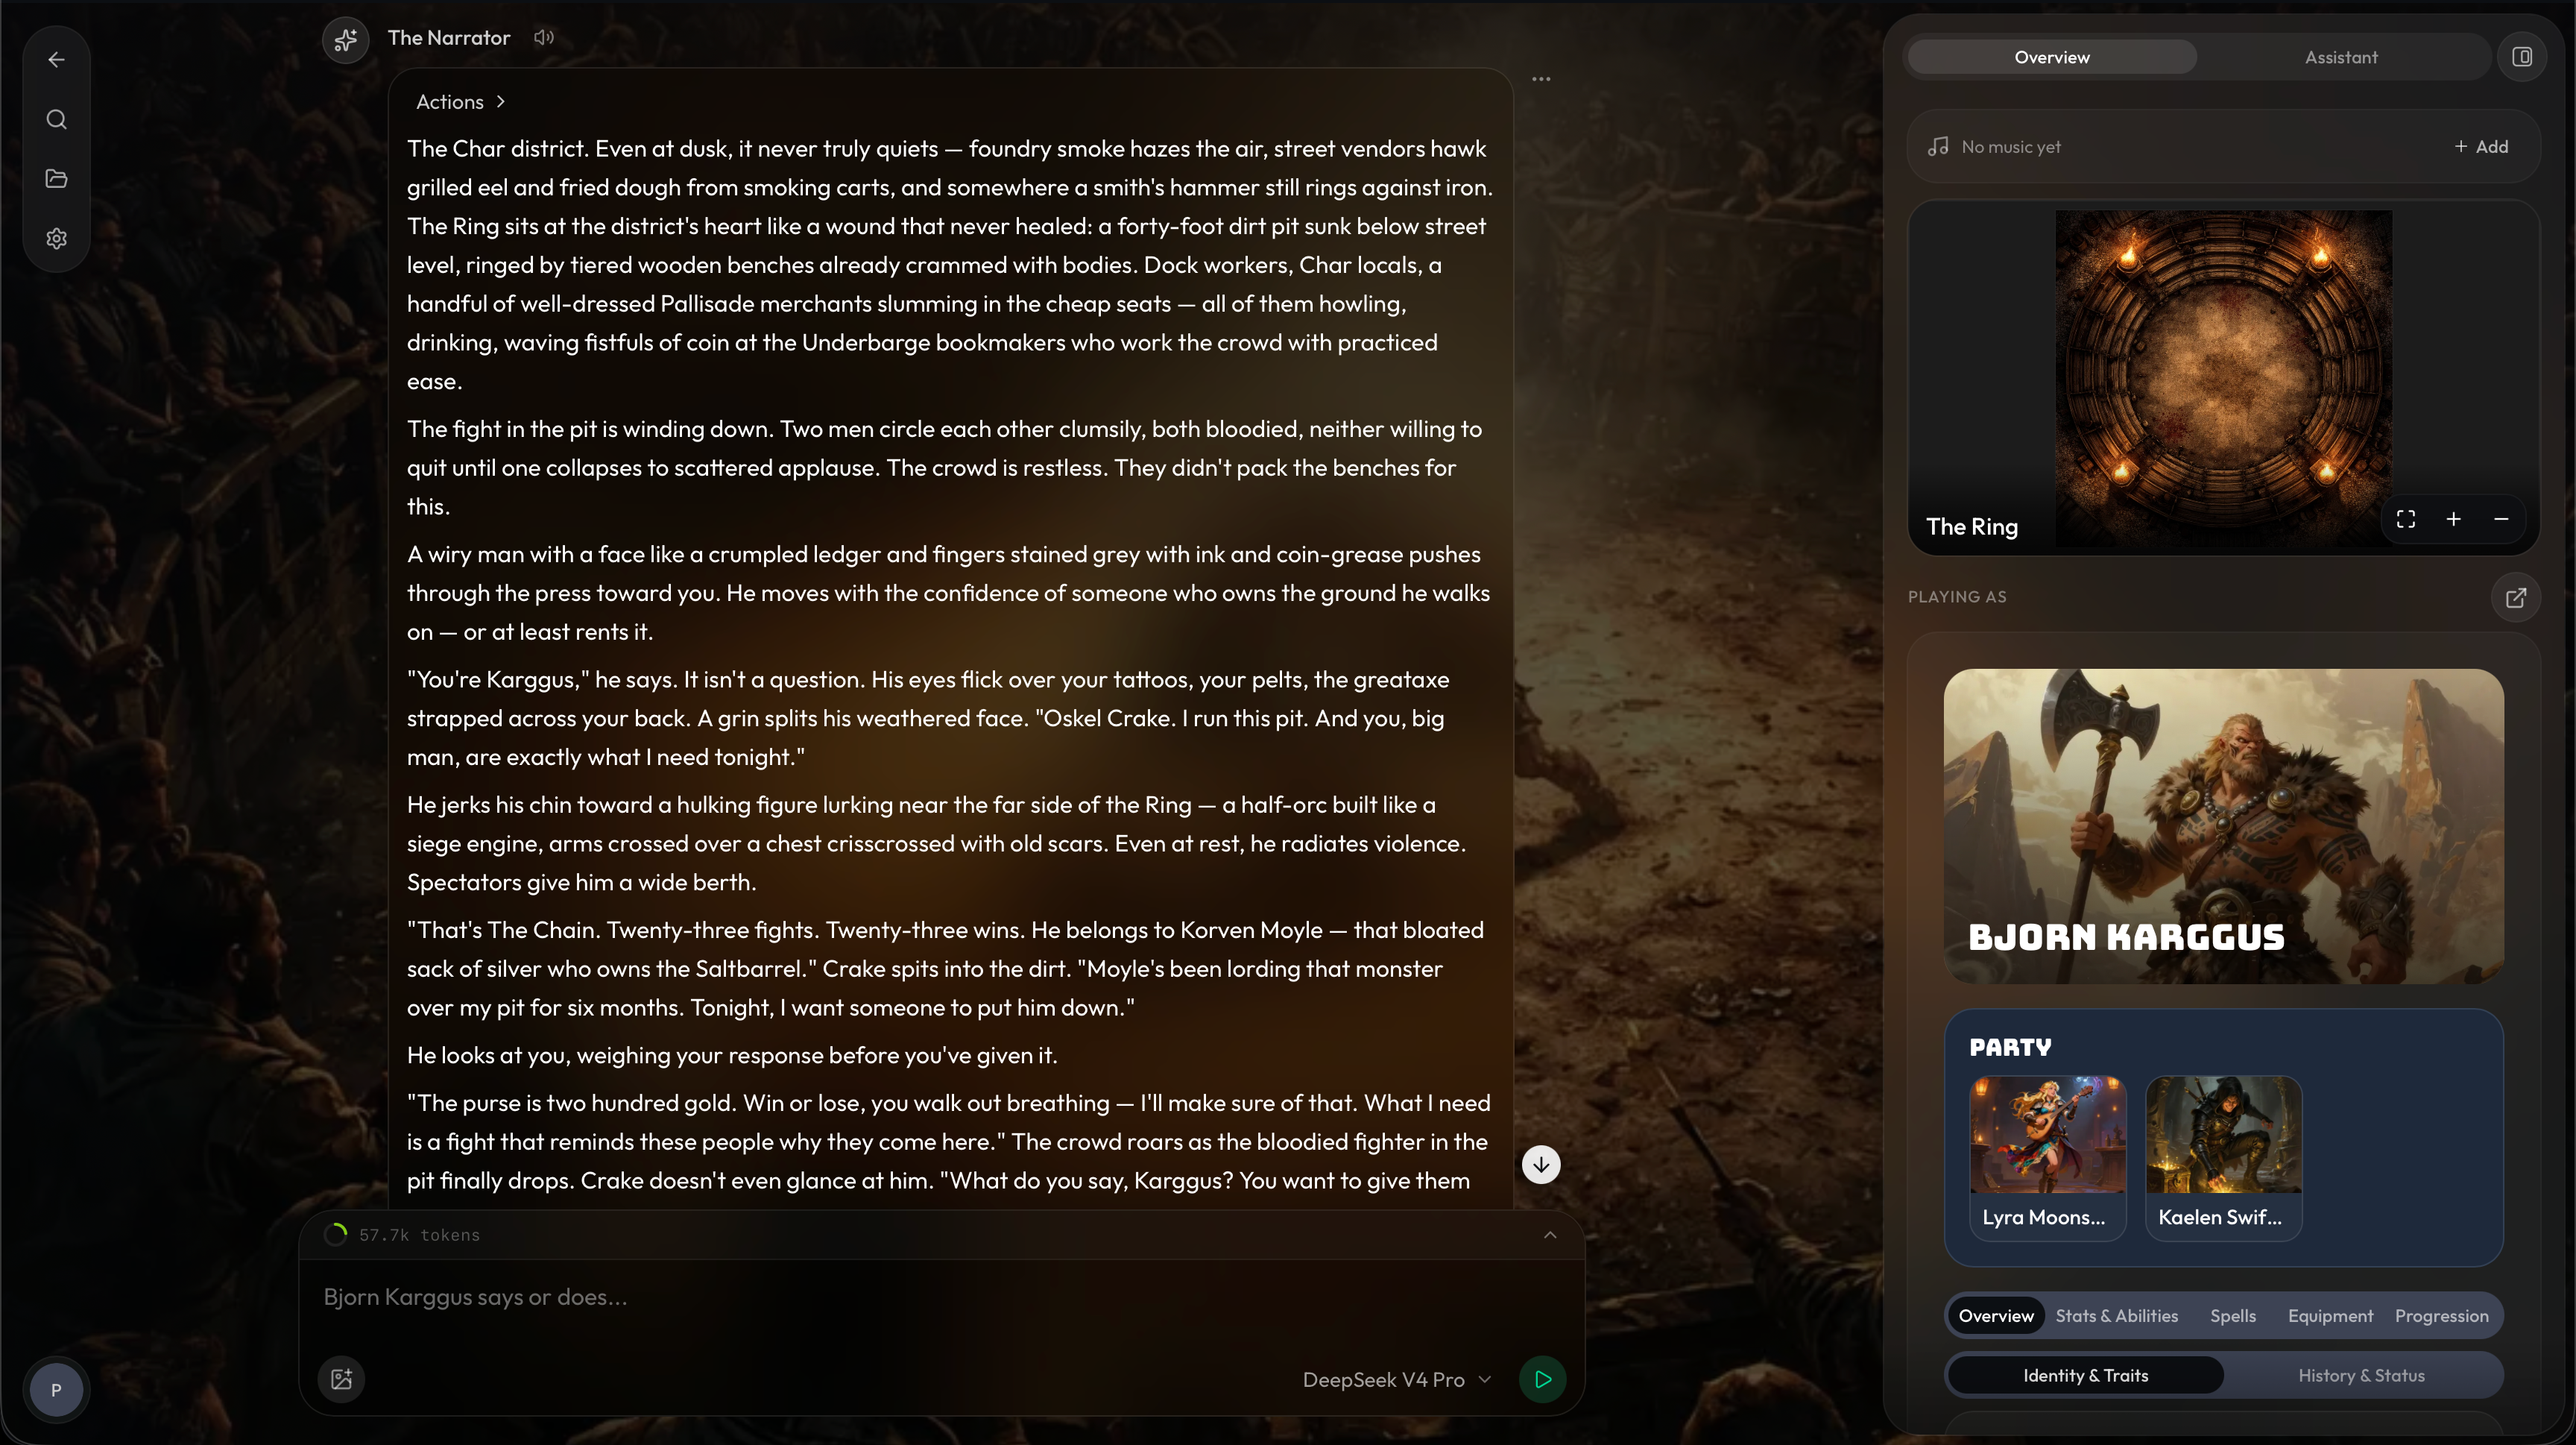
Once you select or create a character, the game loads. The screen splits in two: chat on the left, scene and character on the right.
Top of the chat
-
The GM avatar and name sit at the top. Whatever you set in Project Settings → Game Master — name, portrait, voice — shows up here. The default is the bearded GM portrait, but yours can be anything.
-
The opening GM message usually welcomes you and asks what you do first. Treat that as the table prompt — type as your character, not as the player.
Bottom of the chat
-
The chat input is where you say or do things. "I push the door open and step into the room" works; "the GM should describe a creepy room" doesn’t.
-
The model picker at the right of the input lets you switch which model is running the GM. Pricier models tend to follow long instruction sets more reliably; cheaper models are faster and let you play longer on the same energy.
-
The token chip above the input is your context meter — useful if you’re trying to keep sessions lean.
Right panel
-
The Overview tab shows the current scene image, the music attached to the location (if any), and your character with the schema you built — Stats, Spells, Inventory, Progression, whatever tabs your file type has.
-
The Assistant tab opens Orbit, who is more useful in your own games than anyone else’s — see below.
Building while you play
Because you own the project, Orbit can edit it during a session. When you spot something that should be a real file — a faction the GM keeps mentioning, a city without a file, a custom rule that needs to be written down — open the Assistant tab and tell Orbit. Orbit can create files, update file types, write GM instructions, and tweak layouts without you leaving the game. See Orbit, Your Personal Assistant for everything it can do.
A few examples of mid-session prompts that work well:
-
"Create a location file for the Saltbarrel and link it to the current scene."
-
"Add a Reputation field that maxes out at 10 to the Character file type, and set mine to 2."
-
"Write a GM instruction that triggers when a player attempts a Stealth check."
Treat the chat as a way to draft, and the workspace as a way to revise. Anything Orbit creates shows up in your file tree as soon as you switch back, ready to edit by hand.
Playing someone else’s world instead? The same in-game UI is covered from the player’s side in Playing a Published Project.